

No Sew Pleated Ribbon Tutorial for RRR
Hello, fabulous ribbon lovers! Spring is in the air, and I am having a lot of fun playing with the gorgeous ribbons in the March Ribbon Club selection from Really Reasonable Ribbon!
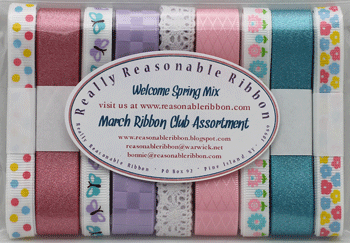
I am tickled, because these ribbons work so well with the new Botanical Tea collection from G45. I've altered a little tin with ribbons from the March Ribbon Club and I'm going to share that with you along with a super easy, no sew pleated ribbon tutorial.
Before I do that though, I want to let you know that RRR is having a Design Team Call! So if you dream in ribbon and would like to be on one of the best design teams anywhere, you have until the 30th of March to apply. You can find all the details HERE.
Altered Tin and No Sew Pleated Ribbon Tutorial

Here's my little altered tin. It measures 3" x 4 3/8" x 1". I've managed to pack a lot of fun into this little beauty! The first thing I did was lightly sand all the surfaces to create some "tooth" for things to stick to. I used my Picket Fence Distress Stain Dabber on all the edges, and it took about 3 coats before I was happy with how it looked. I didn't paint the whole thing because I planned on covering it up with ribbon and paper.

I've found that the best way to secure paper to metal or other non-porous surfaces is by using Scor-Tape. It is strong, easy to use and makes altering an item like this a piece of cake. Once I had measured my paper to fit the lid of my tin, I lined the back side with Scor-Tape and glued it down. Easy peasy, and no mess. You don't even have to use scissors with Scor-Tape; it tears very easily but holds on like a bulldog!

See how I secured the Tiffany White Crochet Lace and Spring Flowers Grosgrain Ribbon to the sides of my tin? In a matter of seconds, the sides were taken care of. On the cover, I made banner flags from Turquoise Shimmer Satin. I'm thrilled with how well these ribbons match Botanical Tea!

The front cover has a little hidden flap that opens to reveal a mini layout. There's room on the left to write a note, and lots of fussy cut images on the right.
And, here's where my no-sew pleated ribbon tutorial comes in. Soooooo easy! I cut a fishtail on the left hand side of my ribbon, then ran a piece of 1/4" Scor-Tape along the lower edge of my paper. I peeled off the white liner paper and stuck down the left edge of my ribbon. I went down about 1/2" and then placed a mini glue dot on the top side of the ribbon, folded about 1/2" of the right side of the ribbon back over the glue dot and I had a pleat! I just continued this down the entire length of Scor-Tape. It adds such pretty texture and dimension to this page.
I also added a little Sweetheart Blossom on the far right. I used this to tuck the cover page shut, and it works like a charm.
Want to see what's inside the box?

When you open the tin, you find a "mini" mini that I made with the cut apart page in the 8x8 Botanical Tea pad. I just cut the individual cards out, distressed and inked the edges and then used more Scor-Tape and turquoise ribbon to bind the little book together.
Here are the photos of the inside of the book. I used Flip-Flop fasteners to join the pages together.


But there's another little surprise:

The inside of the tin is also decorated! I ran more ribbon along the sides of the tin, using Scor-Tape to secure it. So easy!
And that's all. I hope you'll give my no sew pleated ribbon technique a try!
Thanks for stopping by! Sharing beautiful ribbon with you makes me happy right down to the tips of my crafty little fingers!
Cheerio,
kathy


WAW! I love the idea :)
ReplyDeleteWhat a sweet tin you really did pack a lot into that little tin I really do like the pleated ribbon thanks for the tip have a wonderful day!
ReplyDeleteWow, impressive! I think I need some of that paper!
ReplyDelete